In this article we will cover how to connect to a Jitsi meeting using the web browser on a desktop computer like Linux, Windows or macOS.
The most reliable way is to just install the Jitsi Meet standalone desktop app for your system. The downloads can be found here:
https://github.com/jitsi/jitsi-meet-electron/releases
macOS: use .dmg
Windows: use .exe
Linux: use .deb or .AppImage
Be sure to have the required permissions in place for audio and video to work.
Managing permissions
For Jitsi Meet to be able to access microphone and camera, the necessary permissions need to be enabled on the operating system level, then on the web browser and finally on the specific website itself.
Testing it out
We can simply test out if everything works by joining a new empty chatroom.
If you are subscribed to the the Above Privacy Suite, you can use our own Jitsi server at:
jitsi.above.im
Note: Use your Above Suite username and password to login to our Jitsi server.
Otherwise you can use a publicly accessible Jitsi instance, like jitsi.vern.cc or fairmeeting.net
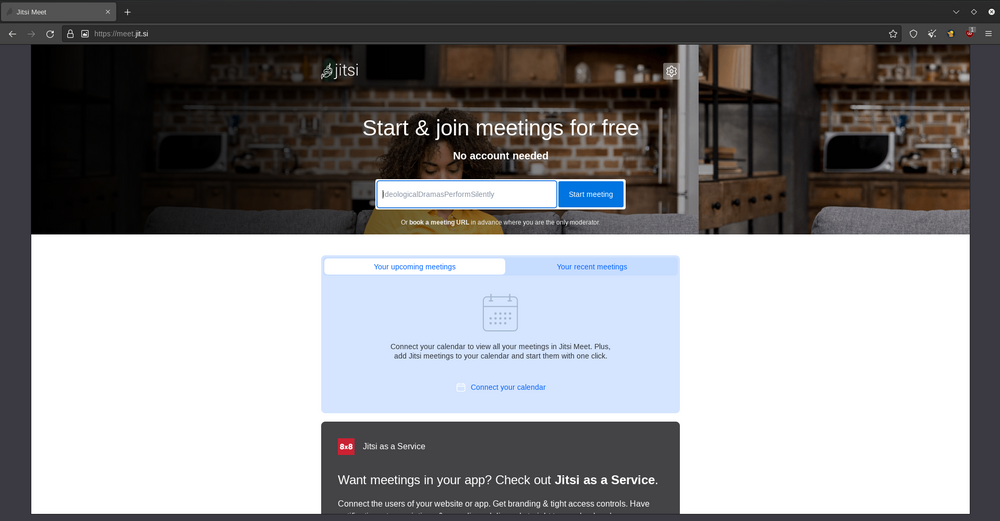
Here on the mainpage we can specify the name of the chatroom we want to join. It will also periodically create a random string of words.
Click on the blue button saying 'Start meeting'
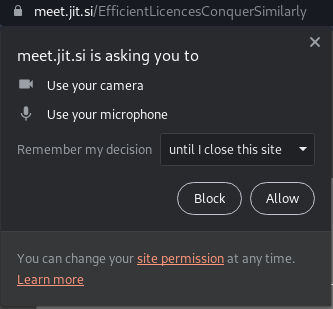
It will take to the lobby of the specified chatroom. Depending on your browser, you may be prompted to give camera and microphone permissions to the website.
- In a Firefox-type of browser (Librewolf, Mullvad Browser) it will look something like this:
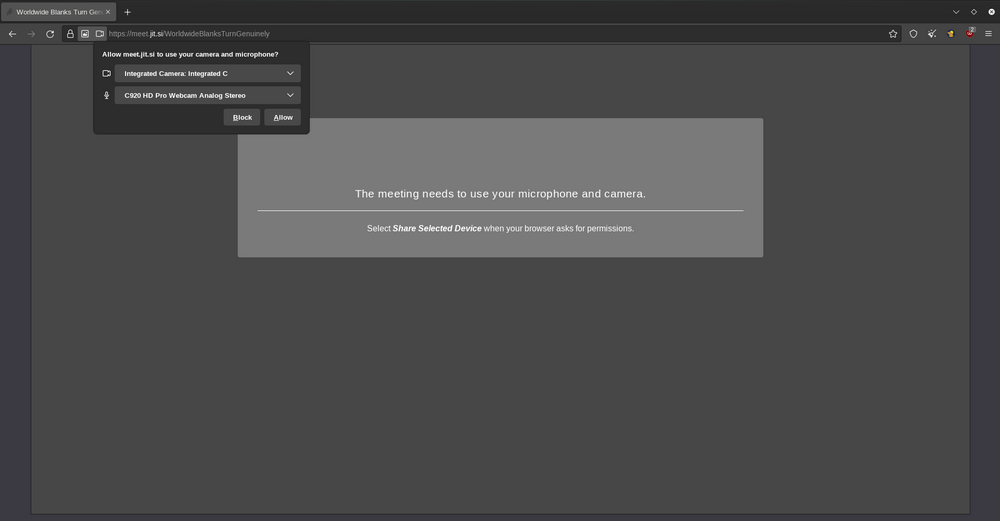
On the top left you may see a window which is the browser app asking you whether you want to give mic & camera access to this website. You can also specify which device / input source will be used for video and audio respectively.
Camera selection:
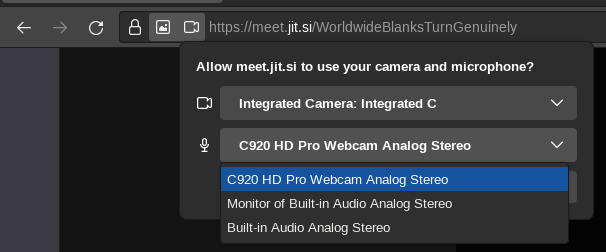
Microphone selection:
In this case we are selecting an external webcam connected via USB to have better video quality. Be sure to click 'Allow' here.
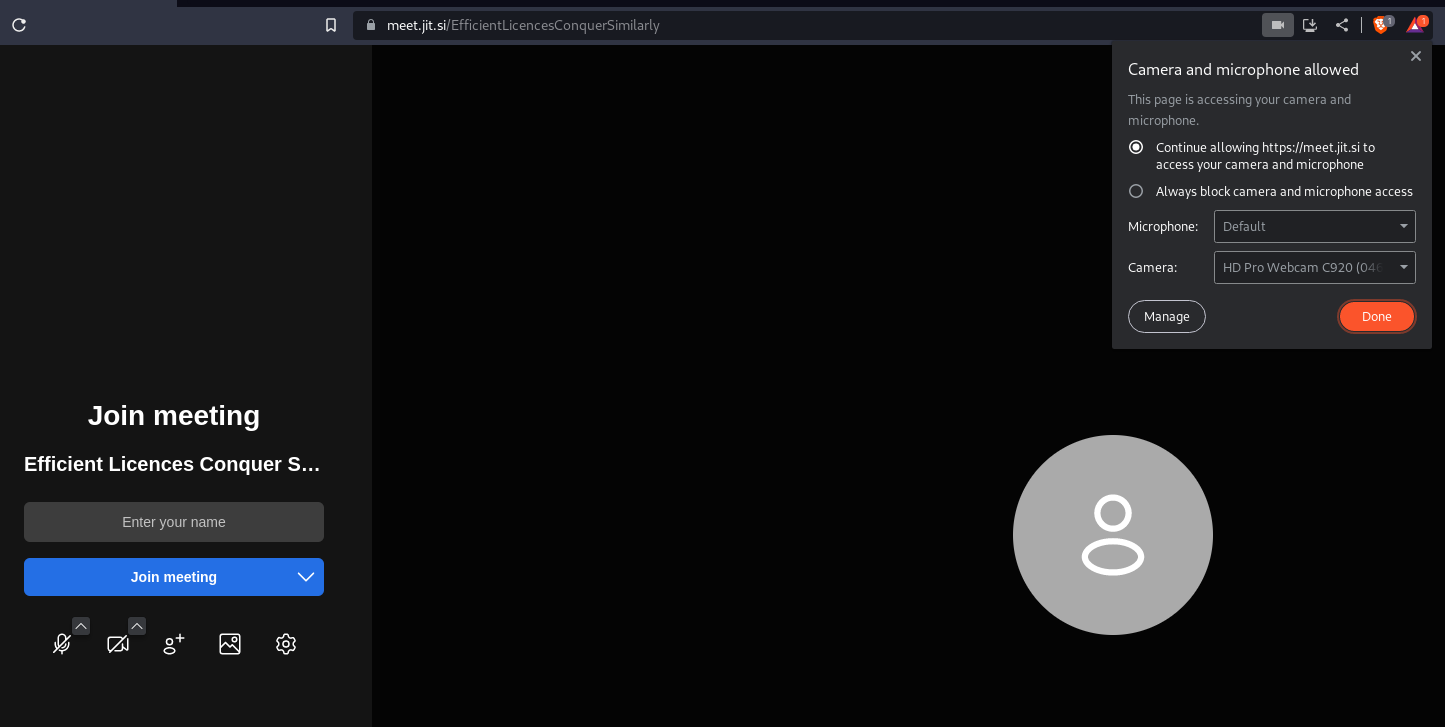
In a Chromium-type web browser (Brave, Chromium, Chrome) the initial prompt looks like this:
After the initial prompt, you can find these browser-level permission settings for cam & mic on the right side of the address bar:
Now that the browser gave the necessary permissions to this website, we can take a look at the website itself and the settings it give us.
On the left sidebar you will see a couple of buttons. If the microphone or the camera button is crossed out, it means that they are not enabled on the site itself.

Just click on them to toggle them off or on.
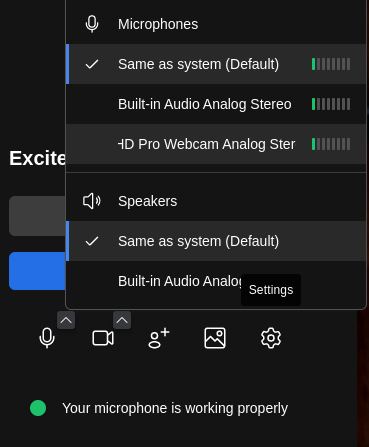
You can also specify the audio input / output settings, as well as the camera. There is a quick selection using the arrows on the top right of the microphone and the camera button respectively. For further settings, click on the gear icon towards the right.
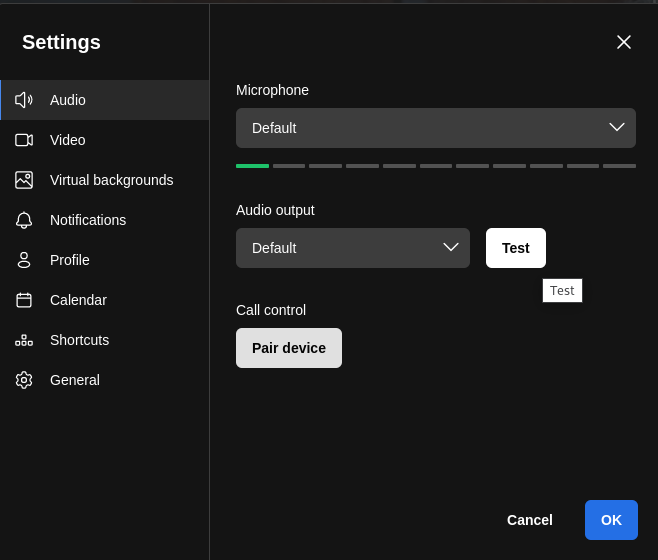
In the 'Audio' section you can see an indicator with columns that shows you if Jitsi Meet is able to pick up your audio at the moment.
If everything is set up right, Jitsi Meet will actually tell you that your microphone is working properly and you should see your own camera image in the screen as follows:
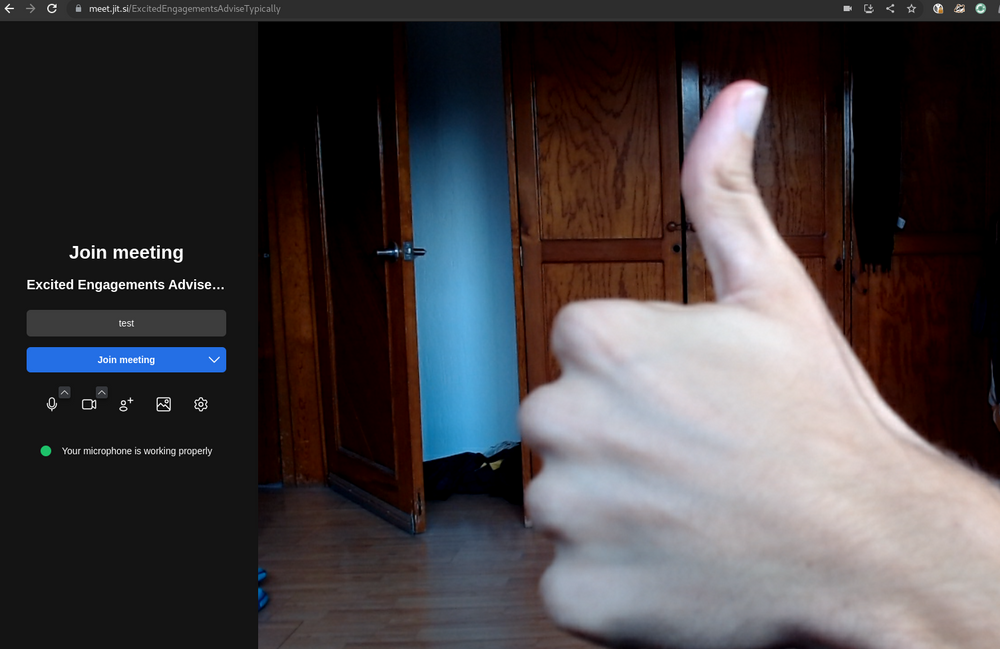
That's it - you are now ready to join the meeting by pressing on the blue button saying 'Join meeting'.
If things did not work for you, please keep on reading for troubleshooting steps.
Troubleshooting steps
If the initial prompt to grant permissions is dismissed, it can be hard to see what's wrong. In this case it may be possible to go into the browser's preferences and explicitly grant the Jitsi website permission to mic and camera. The specific steps to do this will depend on the specific browser.
Chromium-type browser:
Settings > Privacy and Security > Site Settings
Firefox-type browser:
Settings > Privacy & Security > Permissions
If the browser you are using is not working well for you, consider installing a different browser. We recommend Librewolf or Mullvad Browser.
Permissions from the operating system level
In the last section we covered how to enable and manage permissions on the web browser level, as well as on website itself. If you did not get either the camera or the microphone working, it may be because there are missing permissions on the operating system level preventing it.
Let's take a look on what to look out for on different systems:
Windows
Camera access:
Click on the Windows logo or press the Windows key on the keyboard
Go to System Settings > Privacy & Security > Camera
Be sure that 'Let desktop apps access your camera' is turned ON - you should see your browser apps underneath.
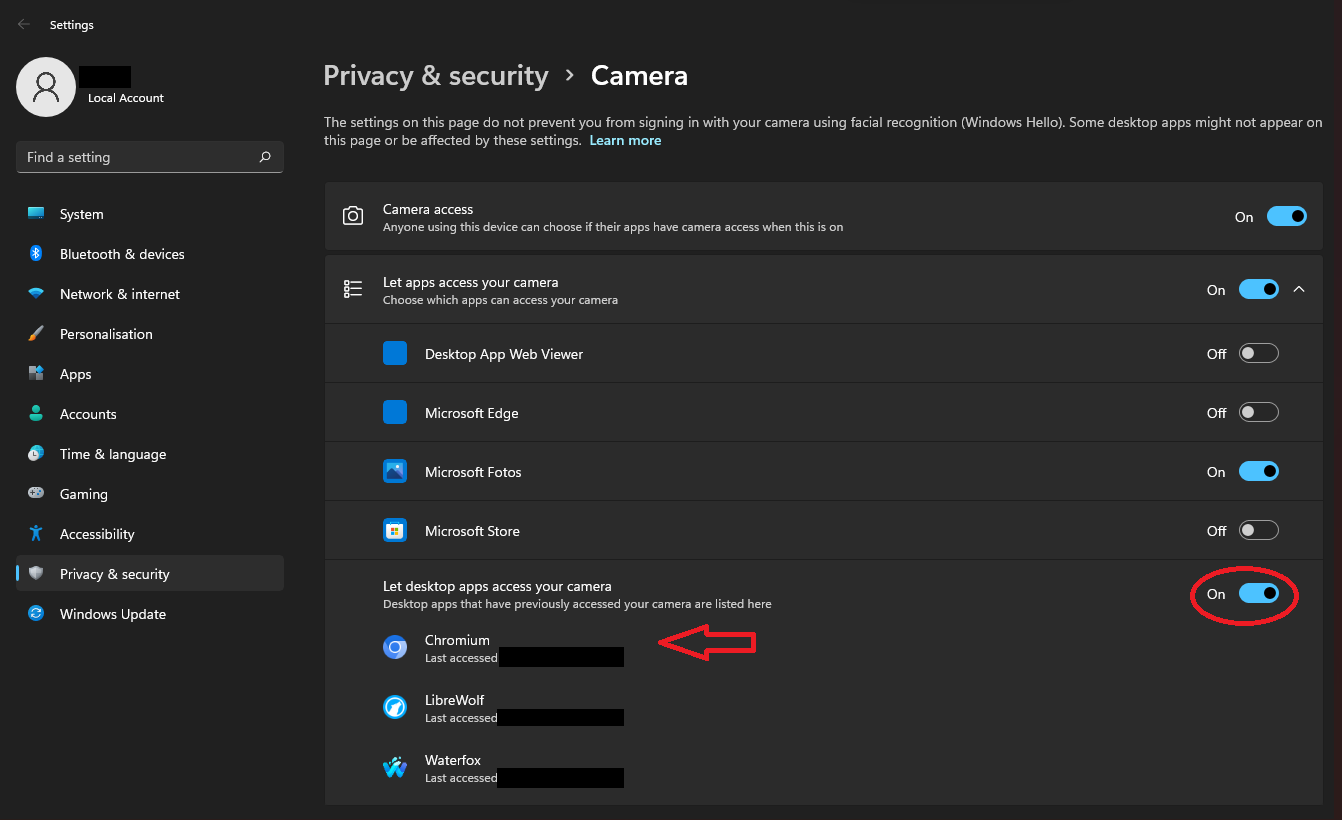
Be sure that 'Let desktop apps access your camera' is turned ON - you should see your browser apps underneath
Microphone access:
Click on the Windows logo or press the Windows key on the keyboard
Go to System Settings > Privacy & Security > Microphone
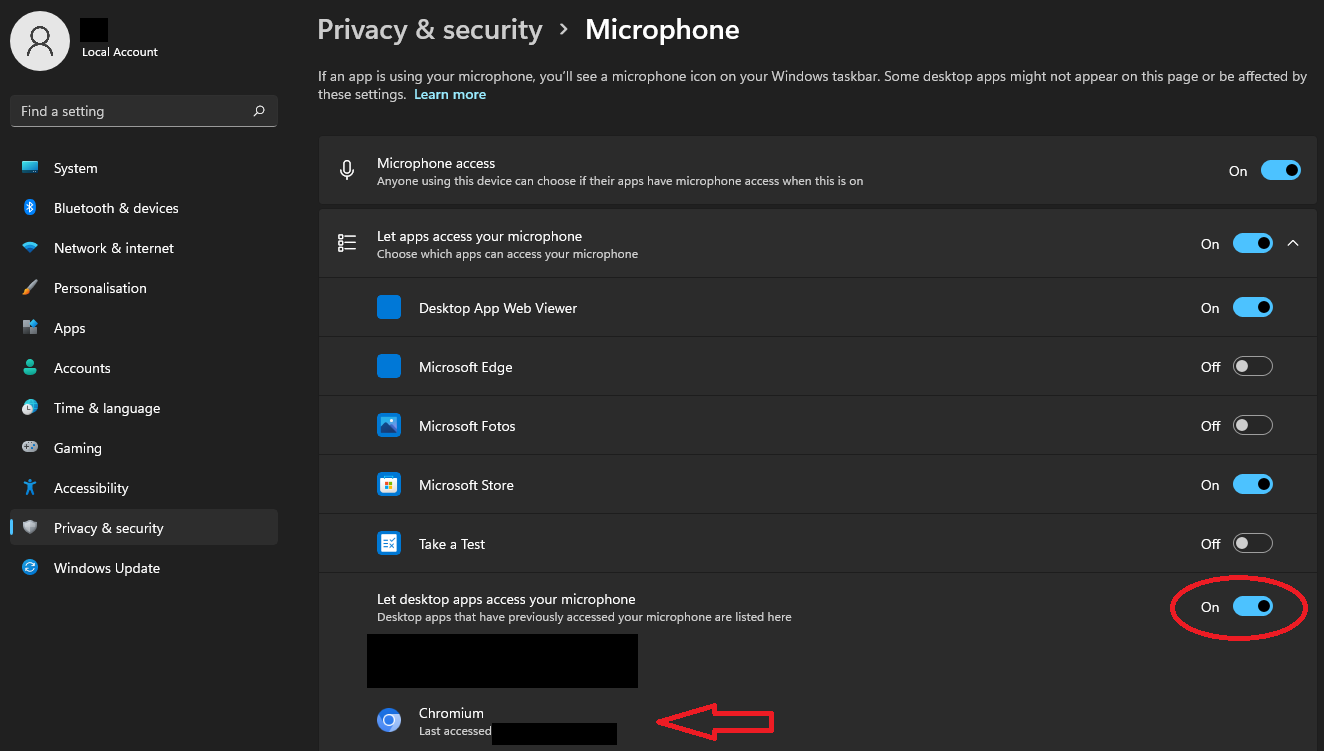
Be sure that 'Let desktop apps access your microphone' is turned ON - you should see your browser apps underneath
macOS
Be sure that your web browser has access to the microphone and camera, as well as screen recording, if you want to use screen sharing in Jitsi.
Click on the Apple logo on the top left, go to System Preferences > Privacy & Security. You should find a section for 'Screen Recording' in there.
If you see the web browser you're using, ensure the toggle is turned on for it. If you don't see the web browser, click the + and add it.
To learn more about Jitsi generally, please refer to our main article:
 mobius
Here are some more articles to get you started with Jitsi: