To sync your contacts, calendar and tasks on a desktop computer, you just have to integrate your Above Privacy Suite (APS) account into any application, that supports CalDAV & CardDAV.
Some Linux distributions will already have this feature built-in the system (for example: Fedora).
Let's take a look at how to set it up with Evolution, which is a popular Email, Calendar & Contact management tool for Linux systems.
GNOME Evolution
Evolution is our recommended app to use, since it is fully open source and has been developed over more than a decade.
Please note that Evolution only exists for Linux systems.
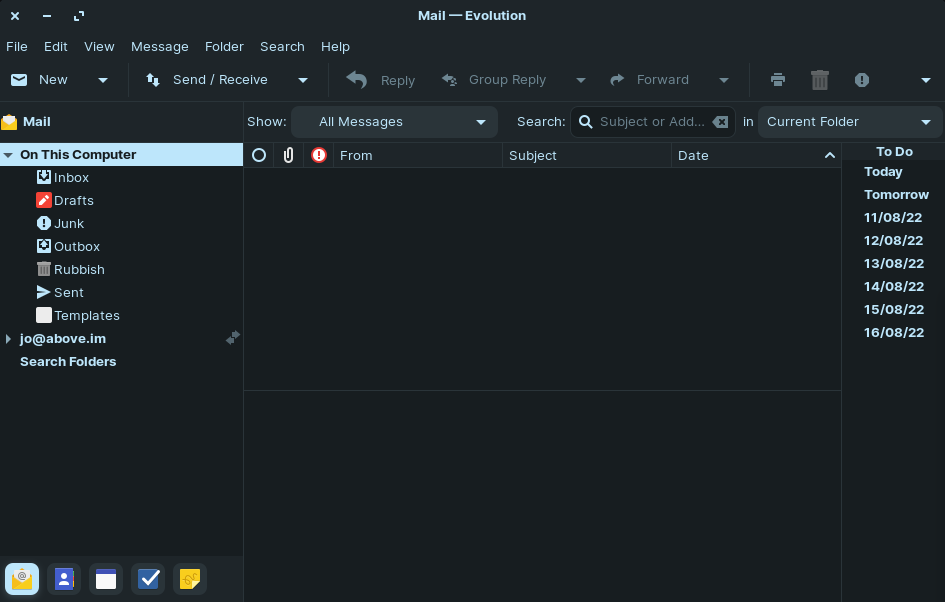
In the Evolution desktop application, you can access 5 different tabs which are located at the bottom left:
- Mail
- Contacts
- Calendar
- Tasks
- Memos
Syncing Calendar
You can sync their calendar by using the CalDAV protocol which is also supported by Evolution.
- Click on 'Edit' on the menu bar
- Select 'Accounts'
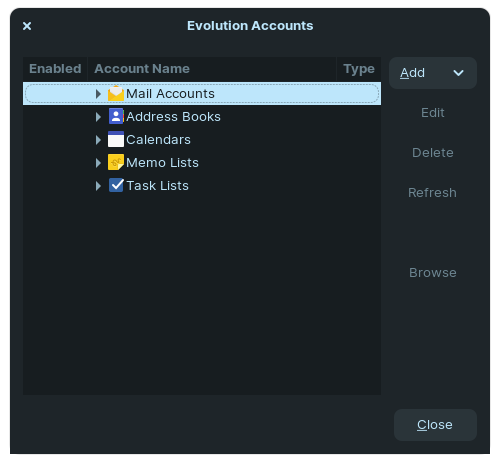
3. A pop-up menu will appear. Click on 'Add' on the top right.
4. A drop-down menu will appear. Select 'Calendar'
5. You can pick the type of calendar they wish to add. Select 'CalDAV' on the drop-down menu.
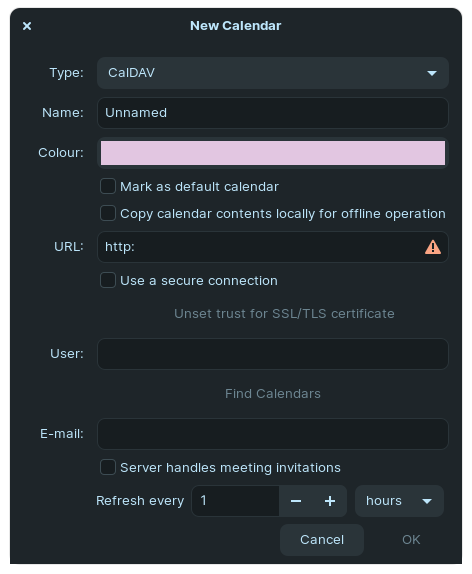
6. In the URL section type in: cal.above.im
7. Fill in your credentials (username/email) under the User section. This is the same as your Above Email address, so: username@above.im
8. Click on 'Find Calendars' and enter your password
Your calendar should be synced now with the CalDAV link!
Syncing Contacts
You can also sync your contacts with Evolution by using the CardDAV protocol and the process is fairly similar.
- Click on 'Edit' on the menu bar
- Select 'Accounts'
- Select 'Address Book' instead when you are adding an account
- Pick 'CardDAV' for the type of address book
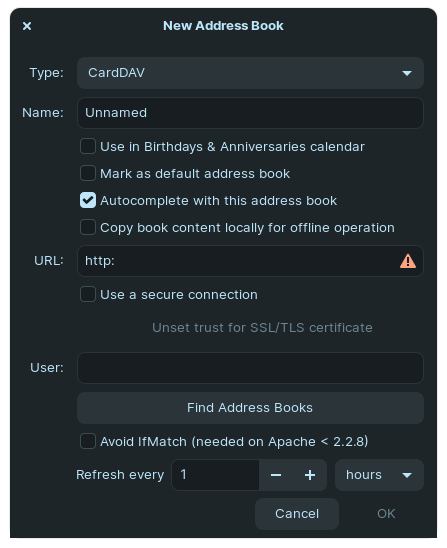
5. In the URL section type in: cal.above.im
6. Fill in your credentials (username/email) under the User section. This is the same as your Above Email address, so: username@above.im
7. Click on 'Find Address Books' and enter your password.
Your contacts should be synced with Evolution now!
Thunderbird
Here we will show you how to set up and synchronize your Calendar and your Contacts / address book with Mozilla Thunderbird (Windows, macOS, Linux).
If you want to also access your Emails with Thunderbird, please follow this link
Syncing Calendar
When setting up Thunderbird you may see this screen with options to connect CardDAV address books and connect to a remote calendar (CalDAV).
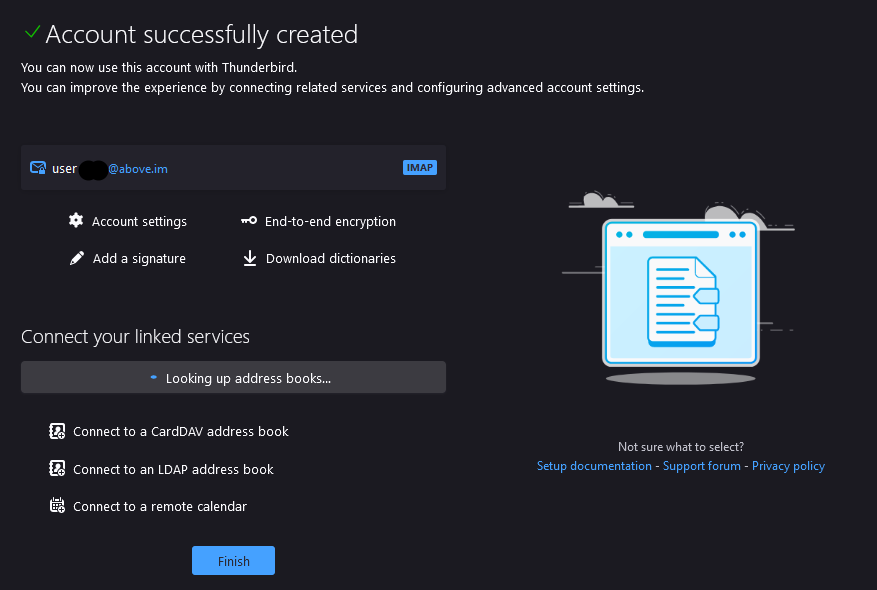
Let's take a look how to connect your synced calendar first. Just click on 'Connect to a remote calendar'.
Alternatively you can also go to the Calendar section, right click and select 'New Calendar...' at the bottom left.
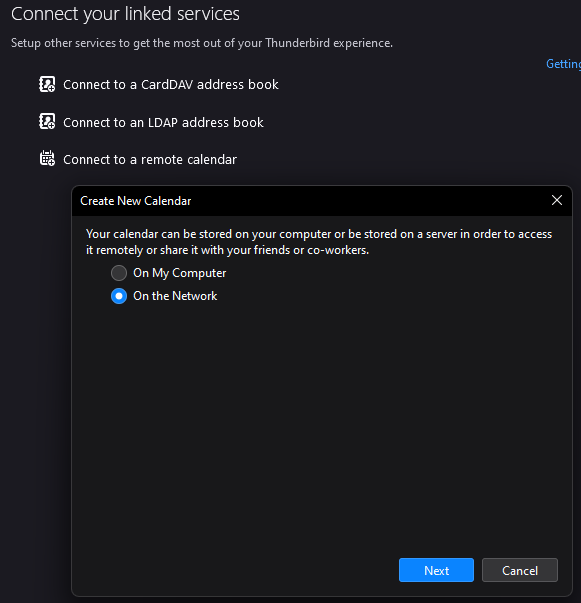
If will bring up a new window. To setup your synced calendar from Above Privacy Suite, choose 'On the network'.
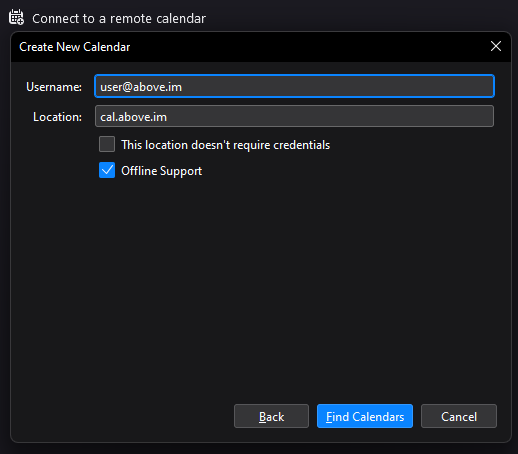
In the next page set it up as shown here.
For Username use your Above Privacy Suite username as the first part, ending with @above.im - this is identical to your Above Email address.
For Location use our DAV server address:
cal.above.im
Then click on 'Find calendars' - you will be prompted for a password:
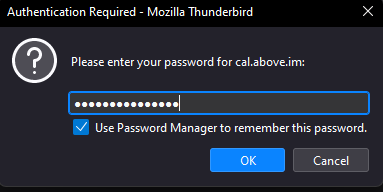
Type in the password you set for your Above Privacy Suite account - again, this is identical to your Above Email password.
That's it! If you connected your Above Phone to the synced calendar using DAVx5, you should now see your calendar events on both devices in the same way.
Syncing Contacts
When setting up Thunderbird you may see this screen with options to connect CardDAV address books and connect to a remote calendar (CalDAV).
Let's take a look how to connect your synced contact list / address book. Just click on 'Connect to a remote calendar'.
Alternatively you can also go to the Contacts section, right click and select 'New Address Book...' at the bottom left.
If will bring up a new window.
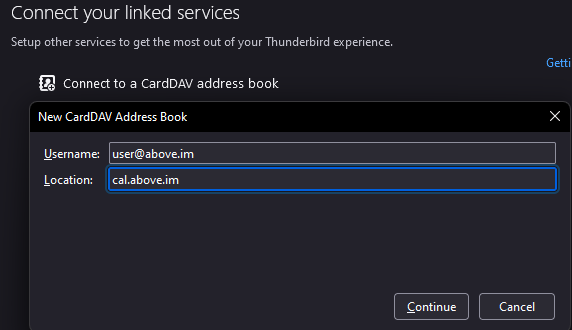
To setup your synced contacts list / address book from Above Privacy Suite, fill in the following:
For Username use your Above Privacy Suite username as the first part, ending with @above.im - this is identical to your Above Email address.
For Location use our DAV server address:
cal.above.im
Then click on 'Continue' - you will be prompted for a password:
Type in the password you set for your Above Privacy Suite account - again, this is identical to your Above Email password.
That's it! If you connected your Above Phone to the synced contact list / address book using DAVx5, you should now see your contacts on both devices in the same way.
To learn how to setup CalDAV and CardDAV on the above phone, follow this article:
Syncing your Contacts & Calendar on Mobile with DAVx5C