PLEASE NOTE, YOUR CALL STILL NEEDS TO BE CONFIRMED BY A MEMBER OF OUR SUPPORT TEAM.
Our engineers have busy schedules, they will confirm an appointment when its received.
Please keep checking your Email for confirmation of your booking with all details - be sure to also check your spam folder - especially for Proton Mail & Gmail.
If you don't see any Email from us until the meeting, please reach out to us directly.
Preparation Checklist
- Check that the call was confirmed
- Update your computer with Full System Upgrade
- Plan ahead and have all of your information ready
This article is a guide on how you can prepare yourself and your Above Book to get the most out of a support call with our team.
Please note: our calls are usually NOT regular phone calls. Instead we use the online platform Jitsi Meet.
Here is a quick overview of the content covered here:
- Planning ahead
- Connecting to the Internet
- Updating the Operating System (OS)
- Registering Above Suite account (only applies if purchased)
- Printer or other peripherals | accessories connected/working?
- Joining the call on Jitsi Meet > connecting from another device / platform
- Showing up for the call
Getting Confirmation
You should receive an email with subject line 'Above Book Call' or 'Event invitation', search for this and you will see a link to join the meeting in the email. We will see you on the call link on the time and date of your appointment!
Planning ahead
Please write out the list of things you would like to accomplish and migrate. Get all the devices and login credentials ready for the call.
For longer sessions like migration sessions, we recommend to prepare more extensively.
Think ahead of your strategy - more... Get all devices / credentials / data ready
Depending on what you want to achieve, please try to think ahead of all the devices, data and information you may need along the way for those specific goals. Include the list of goals on your booking information, to help the support engineer prepare themselves for your call.
Examples:
- Google or Apple ID + password
- existing Email account credentials
- Above Suite credentials
- WiFi password
- Printer connectivity issues
Connecting to the Internet / VPN
To have a proper starting point we recommend to have already connected your laptop to the internet before the call. You can do so either with WiFi, the Ethernet adapter, or USB tethering to your phone.
Explore the options in the Networking settings section - WiFi can be activated and managed, as well as mobile data: Settings -> WiFi & Internet → WiFi & Networking
Use the WiFi system tray icon 🛜 in the upper right to view available access points, find yours and click connect, enter the passphrase if required.
Note: If you are using a VPN, please try connecting to the internet and verify it works as expected. (ex. try using the search field from a browser)
Updating the Operating System (OS)
The operating systems we use regularly receive updates. For best security, functionality and overall experience it is generally recommended to always update to the latest version.
How to install updates:
- Press the 'Windows' key
- Begin typing Full System Upgrade and click it to run the program
- Follow the prompts and type in your user password
- Wait for the updates to complete
- After its done, reboot your computer
Note: Installing an update may take 5-15 minutes in total. You may be prompted to reboot your device and it may take a while to start and set itself up.
Registering the Above Suite account
Note: this section is only relevant if you purchased the optional Above Suite
After making the purchase of the Above Suite (AS), you will get an Email to the address you provided with the subject line: "Above Suite" It will give you a link to the website where you can create your new account on our private servers:
On this site in the field for 'CUSTOMER EMAIL' just put in your email that you originally made the purchase with.
Then define the username and password for your new AS account.
Note: We recommend to use a strong password (and save it in a password manager like Bitwarden or KeepassXC).
Once your account is created you will get your account details sent to your email: "Your Above Suite Account Information"
You are now ready to use your accounts and services from your Above Suite! To set those up we invite you to check out our guides.
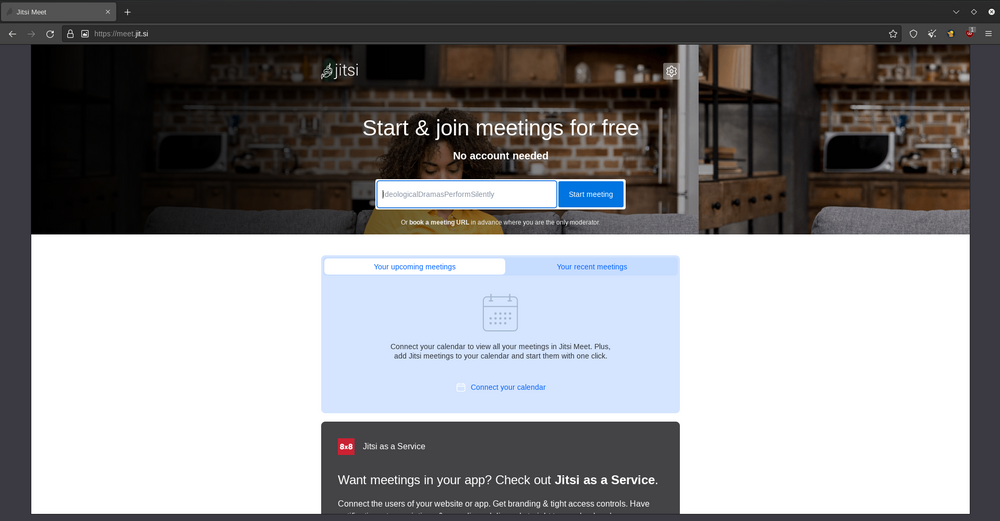
Joining the call on Jitsi
You can join the Jitsi call from any device. We recommend to join the call directly from a computer. It should work with any modern web browser, with the required permissions enabled.
Tip: The most reliable way is to use the Jitsi Meet standalone app - it can be downloaded from the Software Store if not pre-installed.
To join the call via the Jitsi Meet app:
- Open the Jitsi Meet app from the application launcher.
- On the top part a field generates random room names. Enter the complete URL that was provided in the Email - ex. https://jitsi.above.im/book-45
- Then click on GO
To join the call via the web browser, just click the appointment link in your email.
The Jitsi Meet meeting will open in your default browser.
Be sure to give the required permissions inside the browser, as well as in the system settings. Your browser will prompt you for camera/microphone access.
It will take you to the lobby of the chatroom where you can test your microphone and camera. Be sure to accept the permissions here!
- Just tap on Join Meeting to jump in.
Note: The room name equals the duration of the call. As an example, for 45min Free Laptop Calls we generally use this link: https://jitsi.above.im/book-45
Note: The correct link is specified in the invitation/confirmation email.
Once in the call, you can activate the Microphone and the Camera using the buttons of the navigation menu on the bottom of the meeting window - be sure to allow the permissions when prompted! (this app is open source and privacy friendly).
Note: for Screen sharing the camera permission is required.
Caution: When connecting with multiple devices to the same call, before you enter the call with a new device, disconnect the first device from the call or turn off the microphone and mute the sound / speaker completely on one device! Otherwise it will create a very distracting audio noise loop with the nearby devices 'hearing' each other.
General info on Jitsi: Jitsi is a decentralized video conferencing platform that respects your privacy (unlike Zoom, Skype, Google Meet, Duo, etc.)
Check out our guide on how to use Jitsi Meet with desktop computers to verify that everything is working properly.
Showing up for the call
In order to get the most out of the call it is recommended to show up a few minutes early so that you'll have time to check your audio & video. When joining the Jitsi call be sure to double check the link of the chatroom, as explained further up.
In anticipation of the meeting, you may want to consider the time zone differences of your call request:
- The 'Booking Submitted' Email will list the 'Invitee time zone' which is supposed to be your current time zone.
- The 'Event Invitation' Email will list the time zone of the support engineer that will be assisting you.
Please note that the call will be canceled if you are not on the call within 10 minutes after the scheduled time. If you can not make it after all, please let us know as soon as possible. If you cancel at least 12 hours before the set appointment, we are happy to reschedule the call for you.
We are excited to help you in your process of achieving solid digital privacy!